Whimsday: In Which I Tell You All The Things I’m Whimsing About

On this, the 29th of May, in the year of our Lord 2 thousand and 13, I proclaim these to be my wishes, to be granted by whichever fairy godmother so chooses to take on the whims of mostly contented mid-twenties woman (sounds like an easy job, right?)

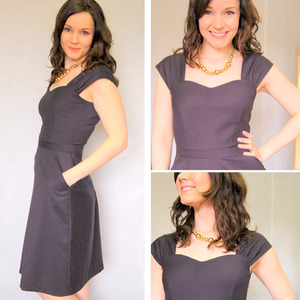
Whim number 1: The Cambie dress pattern. And, of course, the most beautiful fabric to go with it.

whimsday cambie dress

http://www.sewaholicpatterns.com/product/1202-cambie-dress

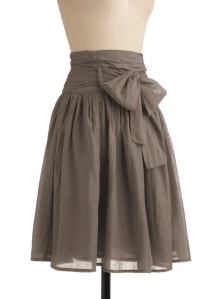
Whim number 2: The perfect fabric to knock-off this beautiful ModCloth skirt

whimsday skirt

http://www.modcloth.com/shop/skirts/in-tandem-skirt-in-slate

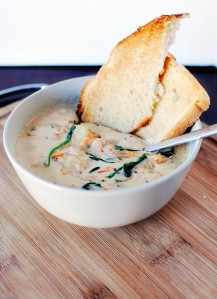
Whim number 3, on behalf of the spouse: Chicken gnocchi soup recipe from Olive Garden along with perfectly warm homemade bread

whimsday gnocchi soup

http://passthesushi.com/quick-dinner-fixins-olive-garden-chicken-gnocchi-soup/

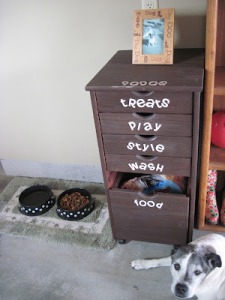
Whim number 4, on behalf of the dog (but really for me): a beautiful doggy stuff-organizer

whimsday kit

And, lastly, whim number never-going-to-happen-like-ever: a beautiful sun-room with a perfectly manicured but still overgrown backyard

whimsday out

Let it be written. Let it be done.

Tune-up Tuesday: In Which I Inform You of All My Latest Projects

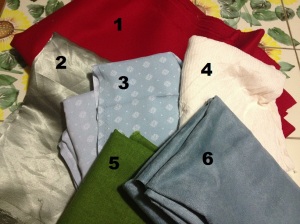
Thank heavens for memorial day sales! I freaking love when the sale stuff is discounted even more! It makes me want to buy the whole store and then some. Luckily, Joann doesn’t always have the best fabric selection so I wasn’t tempted to buy everything. But I did find some good stuff.

IMG_0987

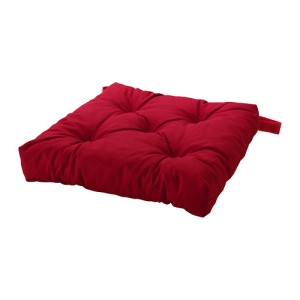
Fabric #1 is a duck cloth with a really saturated red color. I’ve had this project in mind to make some cushions for our kitchen chairs, similar to this:

cushion

I was debating between this fabric and some plain red cotton, both of which were on sale for about a quarter of their original price. The duck cloth was $3 more per yard, and since I knew I’d need quite a few yards it was a hard decision. I ended up going with the heavier fabric knowing that I’d have to justify it to Andrew. It’s more durable! So the cushions will last long through our first few children. And I will definitely want the same color scheme for all my kitchens for the next few years (haha, yeah, right).

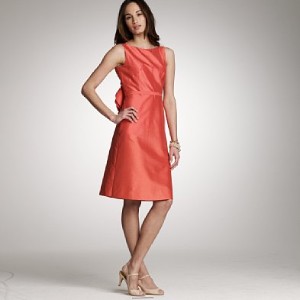
Fabric #2 is a sea foam green dupioni silk that I scored for $3 a yard (marked down from $23). I wish now that I’d gotten more; it really is a beautiful fabric. I’m not entirely sure what I’ll make with it; maybe a pretty dress like this one:

dupioni silk dress

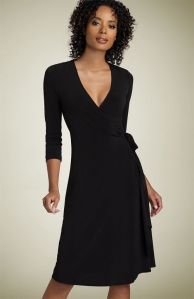
Fabric #3 is a simple printed knit with about 25% stretch across the grain. I just thought it was a pretty color and it felt really  nice against my skin. Also only about $3 a yard, so why not, right? Probably going to turn into a simple wrap dress like this one:

wrap-dress

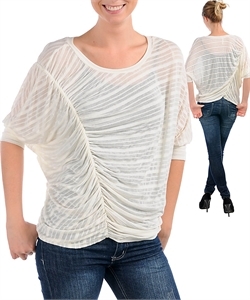
Fabric #4 is a cream colored, gauzy, crepe-y cotton that I really liked in the store but am not so crazy about now that it’s home. But I do have very specific project in mind for it; a dolman top with gathered side seams. Kind of like this one (but also not really at all):

dolman top

Fabric #5 is plain green linen, also for a very specific project. Forthcoming; be patient 🙂

Fabric #6 is a microsuede in a very pretty blue. I’m going to use it to cover 2 throw pillows on my canvas couch.

And there you have it. My Memorial Day sale scores and basically all my up-coming project ideas.

What are you working on?

The Tale of the Brave Kitsune Who Wouldn’t Leave His Mother’s Side

Once upon a time, there was a very sweet little corgi named Kitsune (pronounced kit-sue-nay).

IMG_0804[1]

He was taken from his mother at only 8 weeks old, which really isn’t too different from most other corgis in this world, so he turned out pretty ok. He got a new mom and dad and they took really good care of him except that they made him do all these really weird things like poop outside and walk on a leash and eat out of a bowl. He learned to follow all of their silly rules and that made his mom and dad pretty happy.

But what makes Kitsune happy?

The best thing in the world for Kit, is being able to be near his mom’s feet, no matter where she’s standing. Like, while she’s doing the dishes:

IMG_1478 IMG_1480

Or when she’s in the shower:

IMG_1489

Or watching tv:

IMG_1485

Or sleeping:

IMG_1486 IMG_1487

Or, even, using the potty:

IMG_1481

All of these things combined make Kitsune a very happy dog:

IMG_0940[1]

The end!

Note: Most of these photos weren’t staged. We did use treats to get Kit to look at the camera, though 🙂

80’s Inspired Hylo Tunic

Well I’ve been wanting to join in with Project Sewn for the last couple of weeks but haven’t been able to get my act together enough (plus I only found out about it like 2 weeks ago). I’ve really loved getting to know a small piece of the sewing/blogger community through this project (and when I say “getting to know” what I mean is stalking blogs like a creeper and not leaving any comments or any other trace that I was there, but I will change that very soon, I promise).

Like quite a few others it seems, I was pretty stumped with the theme “80’s.” Yes I was an 80’s child, but mostly, just that: a child. A child with no fashion sense who let her mom dress her into high school (we don’t talk about that). But then I realized (just like everyone else) that 80’s fashion is making a reappearance in today’s fashion; coincidentally, there was a project that I’d been stewing over that fit the bill pretty well.

And so, without further ado, I give you the Hylo tunic!

IMG_0973 IMG_0974

So you can’t really tell in these pictures, but the sleeves are actually quite poofy. Perfect for emulating the 80’s.

My inspiration actually came from the Sundance catalog (an unlikely place if ever I’ve seen one).

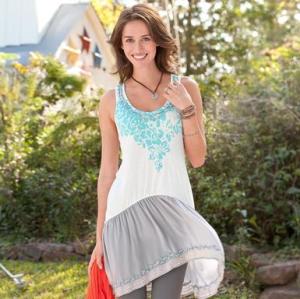
hi-lo tunichttp://www.sundancecatalog.com/product/womens+clothing/womens+shirts/womens+tunics/breezy+hi-lo+tunic.do?sortby=ourPicks

I really liked the way they did the hi-low thing, because normally I’m not a fan of that silhouette.

IMG_0972IMG_0971

I definitely  made the hi-low less dramatic than the original, but I still really like it. Also, I’m quite proud of the neckline. I’m new to the jersey knit neckline and have had quite a few failures so I was proud of how this one turned out.

IMG_0981IMG_0979

Don’t get me wrong, this dress had PLENTY of problems in the construction phase (like binding being sewn on upside down, the skirt being attached inside out, long blue threads EVERYWHERE). The biggest problem was that I was using late nights to sew. Lesson very much learned, sewing gods. Now please bless that my next project can go better than this one.

Overall I’m happy with it. I’m wearing it right now, if that tells you anything 🙂

IMG_0980

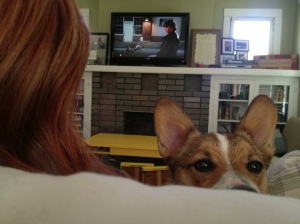
Oh hai, Kit. What do you think of mom’s new dress?

He approves.

Whimsday: In which I tell you about all the things I’m whimsing about this week

Ahh summer. The hottest time of the year…

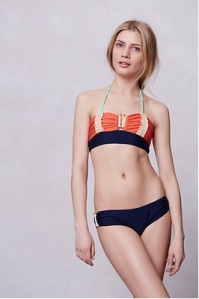
I seem to have a weakness for swimwear and, in particular, bikinis. Which is kind of weird I guess, because my paper-white skin makes me a little too self conscious to really enjoy wearing a swimsuit. But I did see this suuuper cute one on my Pinterest the other day and immediately had that (quite dangerous) thought “I could make that. Easy!”

whimsday bikini

http://www.anthropologie.com/anthro/product/clothes-swimwear-onepiece/26252643.jsp?cm_mmc=CJ-_-Affiliates-_-rewardStyle-_-11292623

I dunno. I’ve never made a swimsuit before and I tend to think that I can make pretty much anything and then I’m often sorely disappointed when it doesn’t work out. There’s not much material here (which, Andrew tells me, is kind of the point) so it wouldn’t be too much of an investment. We’ll see… I’ll let you know if it ever pans out. Also, any tips would be greatly appreciated.

Another thing that I’m pretty sure I could make:

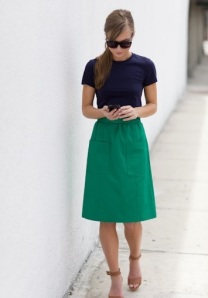
Whimsday kelly skirt

(Link is broken (from pinterest) so… sorry)

Kelly green A-line skirt. This is one of the items of clothing that costs upwards of $200 and I’m like “seriously??? I could make that for like $5!!” I think this will be one of my next projects just because it looks sooo easy. I need something to soothe my seamstress ego after my last project (post forthcoming). I might even make the top to go with it.

Another forthcoming project:

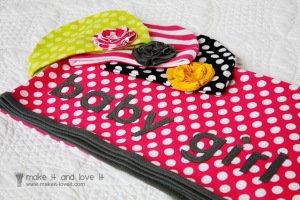
Whimsday baby blanket

http://www.makeit-loveit.com/2011/02/knit-receiving-blanketknit-baby-hats.html

Baby shower gift set. My good friend, Kate, is having her second girl in October. For the first one, I went all out and made a freaking quilt. I will probably never ever ever make another quilt as long as I live which I know some people will be sad about, but it’s really just not my thing (it did turn out pretty cute, though, if I do say so myself). This project looks a bit more manageable and time-effective 🙂

Andrew’s whim for this week:

Whimsday choco cakwe

http://sweetapolita.com/2011/08/sweet-salty-salted-caramel-chocolate-fudge-cake/

Chocolate cake with salted caramel Swiss butter cream. His absolute favorite dessert that he (almost) single handedly finished the one and only time I’ve made it before (and he wonders why I never made it again). But I promised him that if he does well on his accounting mid-term then I would make it for him. He’s ecstatic.

And, lastly, Kitsune’s doggy whim for the week (ok ok, it’s my whim for him; but he does love getting new toys):

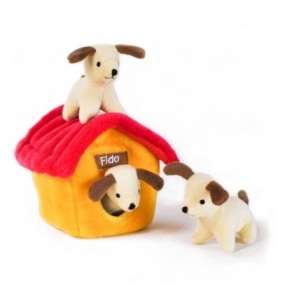
Whimsday dog toy

http://www.amazon.com/Zippy-Burrow-House-Hide-Seek/dp/B005Z2U4WC/ref=pd_sim_petsupplies_6

Zippy Burrow Doghouse hide-and-seek toy. I think the doggies are so cuuuute! And they squeak, which is something that Kit loves. He might tear them apart in like a day, though, haha.

What do you wish for this Whimsday?

The Sailor Skirt: A Tutorial

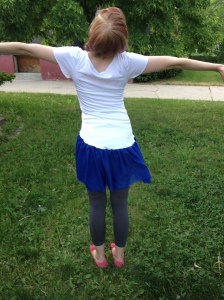
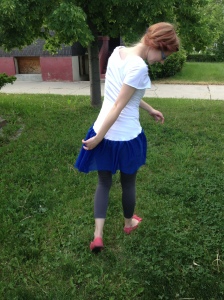
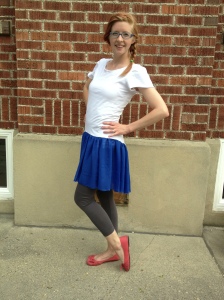
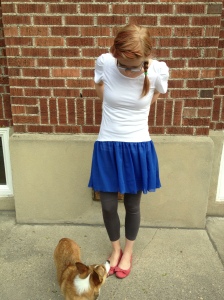
Check out this super cute skirt I made!
It’s really cute and really comfortable so that makes it perfect for me considering pajamas are my wardrobe of choice. I really pulled out all the stops for these pictures. I even did my hurr so that’s a plus.
Now y’all probably think I’m lazy, and you’re right, so that should be motivation enough to go out and buy your fabric for this skirt. Cause it must be at least a little easy.
You’re going to need a yard of whatever fabric you decide to make the underskirt with. I chose a really thin, white, jersey knit that is also really soft and comfy. If you prefer the feeling of raw, chafed skin, though, you should probably go with something like wool. Or cow hair.
You will also need a half a yard of each of your 3 colors should you choose to do the stripes. Most jersey knit fabric comes in 60″ width, which is pretty necessary for this project, so try to get that. If you choose to do just one color, you’ll need a yard and a half of the one fabric.
You’ll also need a length of elastic for the waste band.
Oh and coordinating threads for your fabrics.
Umm what else… I guess you’ll probably need a sewing machine though you could do it by hand.
Ok let’s get started.
1. Take your measurements.
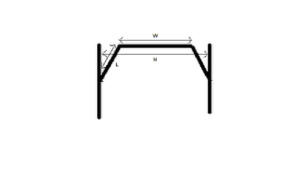
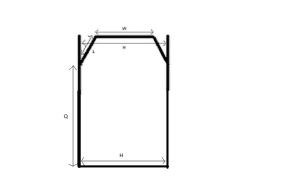
Measure your waist or where you want your skirt to sit, and divide by 2: we’ll call this length W
Measure your hips around the widest part of your ghetto booty, and divide by 2: we’ll call this length H
Measure the length from H to W: we’ll call this L
Measure the length from H to where you want your skirt to hit on your legs, then minus 4″ from it: We’ll call this Q (cause it’s my favorite letter, that’s why)
I don’t have any pictures of this next part, because I thought it would be pretty easy to explain. It turns out I was terribly wrong so I made some handy dandy Paint images that also turned out to be pretty hard (to make and to read). So, sorry.
2. Make your underskirt/liner
Lay out your chosen fabric/hide so that it is 2 layers thick.
On the top edge make 2 marks that are W length apart.
(Here’s the hard math part) Ok so subtract W from H and divide by 2. This is the length that you need to measure out from each W mark. Your 2 new marks should be H length apart. Redo if necessary.
Draw a straight line down from each H mark about 12″.
Connect each W mark to the closest line with a length that is H.
It should look like this so far:
spattern1
(I hope that was clear)
Measure straight down from each intersection and make another mark at Q length.
Ensure that both Q marks are also H length apart. Redo if necessary
By now it will look like this
spattern2
Sorry the images are so small! (And off-center. What?)
Cut this out and sew all the way along the long edges.
And that is your simple pencil skirt. Hooray! We made it.
3. Cut out the ruffles
Depending on the length of the skirt, you’ll need about 2 full length ruffles of each color, or 6 ruffles total. You’ll also need about 2 small ruffles to fill in the bottom
Lay out your fabric so it is 1 layer thick.
Cut each ruffle 5″ wide from selvage to selvage, or about 60″ long. Then cut off the selvages.
Sew long, loose basting stitches in the top of each strip using a contrasting color thread. (I know all you sewers are screaming at me right now, but it’s ok, we’ll fix it. And the contrasting thread is important later; trust me)
Leave both ends loose so you can gather from each end. It’s important to only gather half from each end, like this:
4. Mark your skirt.
Lay the skirt out flat so that the seams are flat on each side.
Measure and mark the left side of the skirt every 4″.
Measure and mark the right side of the skirt ever 3″.
Note: if you want more dramatic diagonals, mark the right side every 2″. You’ll have to account for this by adding more filler ruffles at the end.
5. Sew on the ruffles.
a) Lay out and pin:
Keep your skirt laid out flat.
Pin one end of the ruffle right at the first mark down on the right side.
Pin the middle of the ruffle right at the first mark down on the left side.
Gather and adjust until the ruffle lays flat on the skirt, then pin in place.
Flip the whole skirt over and do the same with the other side.
When you get to the other end of the ruffle, pin it slightly above the first side, like this:
It doesn’t have to be exact because you mostly won’t see it when it’s done.
b) Sew on the ruffle:
Using a larger (4mm) zigzag stitch (this is pretty important), sew the ruffle to the skirt.
Switch to a regular straight stitch when back-stitching; I find this works better for me.
Edit: Also, it turns out some machines won’t let you backstitch on a zig-zag. Who knew!
c) Remove basting thread:
Unpick the thread you used to gather the ruffle. You’ll have to dodge the zigzag stitch, which is why it’s helpful to use a bigger stitch.
This is important because now your ruffles will stretch with the skirt and make it even more comfy 🙂
I chose to do one color at a time so I wouldn’t have to change out my thread so often.
Continue to pin and sew, lifting up layers as you go.
Getting the ruffles to lay flat on the underskirt gets harder as you go; just pay close attention and you’ll work it out. I have faith in you.
When you get done with all your long layers, you’re going to have this triangle of underskirt sticking out. We’re gonna cover this with 2 more layers.
If you’re striping, figure out which color needs to come next.
Cut a 5″ wide and 12″ long strip of this color.
Cut a 5″ wide and 24″ long strip of the next color.
Note: You should double check these lengths; they should be twice as long as they need to be for the gathering.
Sew the bottom one on first, pinning the middle about 2″ up from the bottom, and the edges right at the previous ruffle, like this:
Do the same with the next layer, making the middle 3″ up from the last layer.
6. Sew in the elastic.
Cut a length of elastic that is W minus an inch.
Sew this together like this:
Make a casing for your elastic; the width should be 2 times the width of the elastic plus another inch, and the length should be W.
Sew the elastic into the casing using a 1/4″ seam allowance
Place right sides together of the skirt and the elastic casing and sew together using a 1/2″ seam allowance.
What should happen is you leave your original seam from sewing the elastic into its casing out of the second seam (attaching it to the skirt) so you can cut if off when your are done.
Which is now!
You’re done!!
Hooray!!!
Aren’t you just so cute in your new skirt?
Oh and you can use leftover scraps to make super cute headbands or ribbons or bows or something like that.